You can have a ton of fun with the trampoline. And basketball is another fun little activity that a lot of us love. But did you know that you can get the best of two worlds in a single setup? Yes, it is indeed possible!
However, to do that, you will need to learn how to install trampoline basketball hoop first. And if you do not follow the proper process, the project can take days. On the other hand, it will take just a couple of hours with the correct steps.
Want to know all about the correct procedure and finally have some fun with the DIY trampoline basketball hoop? Well, you came to the right place! We will walk you through the entire process step-by-step.
Table of Contents
Installing A Basketball Hoop To Trampoline
No matter what you might have heard, learning how to install basketball hoop on trampoline is pretty straightforward. You just have to go through these steps:
Step 1: Get the Basketball Hoop for Trampoline Attachment Tools
Before anything else, you will need to get all of the trampoline basketball hoop attachment tools. In some cases, you should see the list of the tools in the trampoline basketball hoop instructions. And that list would be something like this:
- The basketball kit
- Trampoline
- Screwdriver
- Bolts and nuts
- Bungee straps
- Ladder
- Drill machine
- Shovel
Among all of these, the ladder, shovel, and drill machine are optional. You will need the ladder if you need to climb, the drill machine to make holes, and a shovel if digging is necessary.
Step 2: Lay Down All of the Things
Open up the basketball hoop kit and the trampoline kit. Lay them the parts down on the floor. You should match the components with the content list of the box. Also, check whether there are any damages on them or not. If you do find any damaged or missing parts, you should contact the manufacturer right away.
Step 3: Attach the Backboard
Now, it would be time to install the right with the knitted backboard. Get it in place, and then insert the poles through the backside of the backboard. Generally, the kit should come with four of them. And some of the poles might be shorter than the others.
The shorter ones will go in the bottom portion, while the longer ones will be at the top of the board.
Step 4: Attach the Brackets
At this step, you will need to work with the brackets. First, align the L-shaped post with the square-shaped bracket. Usually, the kit will come with nuts and bolts. But some might come with either of the two. Put them in the holes and secure the square-shaped bracket.
Make sure to tighten the bolts and the nuts properly. Otherwise, the structure might fall down and injure someone. However, do not over-tighten the fasteners. That will make the strip, and you would need to get a new set of bolts and nuts.
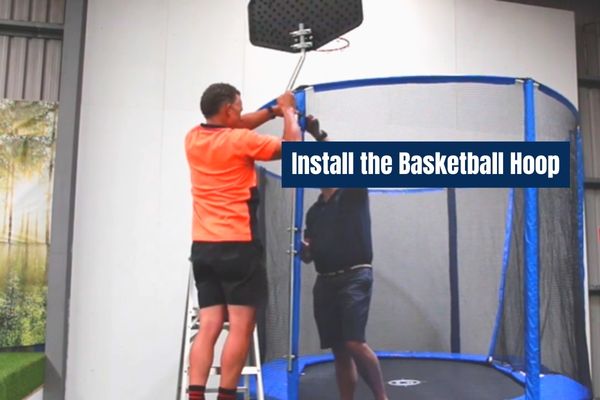
Step 5: Install the Basketball Hoop
Once the bracket is in place, you will need to get the hoop in place. Select the pole or post you want to hang the hoop kit on. Remove the bungee strap and eyebolt from that specific pole or post.
Then, insert the hoop into the pole. Here, you would want the basketball hoop to face towards the center of the trampoline.

After placing the hoop on the trampoline, you will need to reattach the eyebolt. Also, do not forget to place the strap back on. With that, the hoop will not be secure. And with an unstable hoop, you will be basically asking for injuries to happen.
Step 6: Level the Basketball Kit
Finally, you will need to check whether the entire structure has the right level or not. For this, you can use a level gauge. Place it on top of the trampoline and check the bubble. If it stays in the middle, the level is just right.
However, if you notice the bubble going all the way to the left or right, you will need to make some adjustments. Level the hoop by working with the strap. Then, recheck the level. If everything seems good, the trampoline hoop will be all ready for some action.
Installing the Basketball hoop on a Springfree Trampoline System
Do not have a traditional trampoline setup. Well, you will need to follow a different procedure then. Here are the steps:
- Detach all of the poles and lay the net down on the mat
- Unbox the trampoline hoop kit and get all of the parts out
- Select two of the adjacent net posts and put the hoop set in
- Clip one of the plastic clamps on the first pole and put the other clamp give inches below the first one. Do the same thing for the second post.
- Install the stabilizing bar and the brackets
- Bend the stabilizing rod and make it gain the same shape as the backboard
- Insert the small-sized rods into the sleeve of the stabilizing rod
- Using the bolts and nuts, attach the large brackets with the net rods
- Place all of the net rods into the designated C-clip pockets
- Check the level of the entire structure. If you find that the level is off, you will need to make a couple of adjustments to the rod strap. After getting the level right, you can start jumping on the trampoline.
Final Words
Installing trampoline basketball hoop is that it can seem like a piece of cake if you follow the right process. And we can assure if you follow the steps we have gone through correctly, you will be capable of finishing the setup process in a short amount of time.
Also Read: